Cloud storage explained

10 years ago, if you mentioned “the cloud” to me I would have looked up at the sky. If that’s your first reaction to the phrase, don’t worry! “The cloud” is one of the most-used and least-explained tech terms right now. Let’s put it in plain English.

What is cloud storage?

Since computers were invented, data has been stored on physical media (punch cards, floppy disks, thumb drives, etc.). When you want to transfer data from one computer to another, you physically carry your storage media from one computer to the other.

For example, I start writing a report on my work computer, save it to a thumb drive, and then plug the thumb drive into my computer at home to finish editing the report. That’s how most of us are used to doing things.

Cloud storage
This is what “the cloud” might look like — if it were an actual cloud. (But really, this is a pretty good illustration of how data is stored in a remote location and can be accessed by multiple devices.)

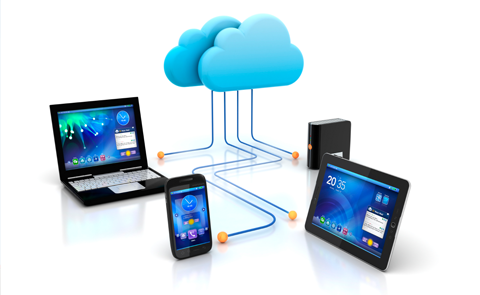
When people refer to “the cloud,” what they generally are talking about is data being stored in a server (i.e. a specialized computer) that’s connected to the Internet. This means any computer connected to the Internet can have access to that data, even at the same time.

So in practice, I would start my report at work, save it to the cloud, then log in and edit it from my home computer. When I’m finished, I can download a copy to store it on my computer if I want. Notice that in this situation I don’t have to physically carry anything home with me. The document is stored on a hard drive that’s connected to the Internet, and the hard drive is owned and maintained by the company providing the service (such as Dropbox).

Benefits of cloud storage

Cloud storage has been exploding in popularity. The services that are most well-known include Google Drive, Dropbox, Microsoft’s OneDrive, and Apple’s iCloud Drive. (I’ll compare these in detail next week to help you figure out which might work best for you.)

Google, in fact, makes a line of inexpensive computers (Chromebooks) with relatively tiny hard drives, specifically because they expect that users will store almost all their data on Google Drive.

As I mentioned, I can download or edit my document in the cloud from any computer with Internet access. I can give other people permission to access it, also from any computer with Internet access.

Google Drive collaboration
Joe, Min Lee, and Mario editing a document at the same time, from different locations (in Google Drive)

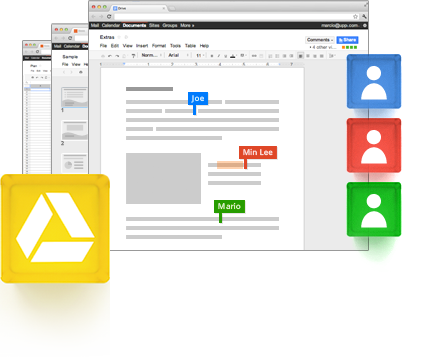
This allows for another major benefit of cloud storage: multiple people can edit a document at the same time, collaborating in real time and seeing each other’s changes as they happen.

Until now, I’ve been discussing cloud storage in relation to computers. Perhaps you’re thinking, Why shouldn’t I just use a thumb drive? Every computer has a USB port.

That’s true, but more and more people are creating and using data on devices like smartphones (taking photos, for example). Many of these portable devices don’t have USB ports, so cloud storage allows people to access and share data much more easily than they would otherwise.

For example, if I kept all my photos on my phone, it would quickly run out of storage space. But if I upload the photos to a cloud storage service, I can access all of them anytime my phone has Internet access. Plus, I can also view them from any other device I use.

Are you starting to see the benefits?

Disadvantages of cloud storage

Of course, there are downsides to cloud storage compared to saving your stuff on your hard drive. Let’s touch on the main ones.

First, and this is the one that keeps me from using cloud storage more, most companies that offer cloud storage charge a monthly or yearly subscription. The cost depends on how much storage space you choose. Typically a small amount of storage is free, such as 5GB on iCloud Drive. This is enough space for a lot of text documents. But if you add in music or photos, that space will be eaten up quickly. And then you’ll pay for the higher storage amounts. (Again, I’ll give more details next week.)

Thumb drives and external hard drives aren’t free either, and you’ll have to weigh the upfront cost of buying that type of storage compared to the subscription cost of cloud storage. I’ve become very used to having my files stored in a drive I physically own, and it’s hard to get used to the idea of paying regularly for the storage.

Second, data you store in the cloud is physically stored in some remote location, not on your desk. This means you’re trusting that your data will be available when you want and won’t just disappear. Also, it means that someone can potentially hack into your account and steal your files.

For the record, I bet every cloud storage company backs up their customers’ data better than you back up your own computer. As for hackers, it seems that hacking situations are caused more often by people using easy-to-guess passwords or reusing passwords from other accounts, than by companies using poor security on their end.

Either way, I wouldn’t  keep personal/confidential files in cloud storage, and I would make sure that my most important files are also stored on a hard drive I own.

Third, data stored in the cloud is only accessible to you when you have Internet access. Internet access is growing, and some devices like smartphones are connected even when you travel. But keep in mind that what you put in the cloud can only be accessed when your device is Internet-connected.

You should use cloud storage, but which provider?

I think cloud storage will continue to be used even more often in the future. It will be especially helpful for those who own multiple devices and want to share files between them.

I’ll help break down the differences between the major cloud storage providers in next week’s post, so stay tuned! Until then, I hope this overview helped you understand what exactly cloud storage is. If you have any questions about it, please ask them below. I’d love to hear from you!

How to back up your computer (Just get started!)

Note: This is the second half of a two-part introduction to backing up your computer. Last week’s post explained why this is so important and what you should look for in buying a backup hard drive.

Socrates bust
Socrates would’ve been wise enough to back up his computer (Photo courtesy of wikipedia.com)

As Socrates once said, getting started is the hardest part of a big project. Well, maybe that was my dad who said that when I procrastinated on the gigantic research paper in 12th grade English.

Well the same thing is true in computer backups! And it’s actually a lot better than a gigantic research paper: once you set up your backups, all you have to do is plug in your hard drive every so often. Everything else is automatic! How easy is that?

You need an external hard drive (we covered that last week). You need backup software (it came with your computer, ready to go!) And you need to know how to set it up the first time (we’ll cover that here).

We’re going to start with Windows 8 computers. If you have Windows 7, click here to skip ahead to that section. If you’re on a Mac, click here. (If your computer has Windows XP, you’ve got bigger problems, but you can click here to read about XP’s backup software.)

Windows 8

Windows 8 calls its backup software File History, and it’s the best backup software yet for Windows. Here’s how to use it:

File History setup
File History page in Windows 8 (Photo courtesy of howtogeek.com)

Click “Control Panel” on the start screen, then scroll to the bottom of the list and select “More settings.” In the Control Panel window that appears, click “System and Security,” then look for “File History” at the bottom of the list. (Come on Microsoft, this is harder to find than it should be!)

Now you’re in File History, and you’re almost done. Once you plug in your external hard drive, you’ll see a button labeled “Turn on.” Click it, and you’ve set up your backups!

Windows 7 Tools tab
The Tools tab in Windows 7 (Photo courtesy of howtogeek.com)

Windows 7

Windows 7 uses a program called Backup and Restore. It’s a big improvement over what came with previous versions of Windows. Here’s how to get started:

Open “Computer” from the Start menu, right-click on your Local Disk, and select “Properties.” Click the “Tools” tab, and then the “Back up now…” button. Click “Set up backup.”

You’ll see your external drive in the list, and it should be labelled Recommended. Select it and click Next. In the next window, have Windows choose what to back up (again, it’s the Recommended setting.)

Windows 7 review page
Review your backup settings in Windows 7 (Photo courtesy of howtogeek.com)

You’ll notice in the next window that Windows has set a schedule for when to back up your hard drive. Change it if you want (I’d change it to at least once a week), then click “Save settings and run backup.” Ta-da! You’ve started your first backup. Congratulations!

Mac

Macs use Time Machine. Very easy to set up, and makes it almost fun to go recover an accidentally deleted file. Here’s how to set up Time Machine:

Time Machine Preferences
Time Machine Preferences page (Photo courtesy of support.apple.com)

Click the Time Machine icon in the top menu bar (looks like an analog clock face), and click “Open Time Machine Preferences…)

First, hit the big switch on the left side of the window to turn Time Machine from OFF to ON. Once you plug in your external drive, you’ll click “Select Disk.” You’ll see a drop-down menu of available disks. Choose yours, click “Use disk,” and Time Machine will run your first backup in a couple minutes!

Wrapping up:

One important thing to keep in mind after you finish setting things up: Windows 8 and Mac computers will run a backup every hour when the external drive is plugged in. Windows 7 runs a backup once a month by default, and if you don’t have your drive plugged in, then you miss that month’s backup.

The easiest thing to do is just leave the hard drive plugged into your computer all the time. That’s better than having no backup! But keep in mind what I said last week about the importance of offsite backups.

I promise getting started is the hardest part! Hopefully these steps will make that process easier for you. If you felt this was helpful to you, please pass it along to someone else who might need help!

As always, if you have any questions or a topic you want help with, send it to me with the form below. I can’t wait to hear from you!

Backing up your computer

I’d known my computer longer than I’d known my wife. That MacBook and I had typed school papers and edited videos together. It stored everything from the invitation for my 14th birthday party to my wedding photos. And one day last July, it just wouldn’t turn on.

It turned out the issue was in either the power supply or the motherboard. Bad news because it meant we needed a new computer. Good news because the hard drive was unaffected. We were able to transfer everything on the hard drive to our new computer.

That’s when I realized first-hand the importance of backing up my computer. I hope you haven’t learned that lesson the hard way. If you haven’t, now’s the time.

According to one study, 1 in 20 hard drives fails within the first year-and-a-half of use. After three years, more than 1 in 10 have already failed.[1] What would you miss if you lost all the files on your computer? Don’t risk it!

computer on fire
If your computer is destroyed in a fire, you probably won’t be home. Offsite backups!

Offsite backups

Now that you know the importance of backing up your computer’s hard drive, here’s one more factor that’s extremely important: offsite backups. If your backups are stored on an external hard drive sitting on the same desk as your computer, it’s protecting you against hard drive failure. But if your computer is destroyed by something like a flood, fire, or tornado, that external hard drive is gone, too.

So always keep a copy of your backups in a separate location from your computer! In my case, I have one backup hard drive at home and one in my office. Every week or so I rotate them, so my offsite backup is never more than a week old. You may have another place that makes sense to store a copy (safe deposit box, relative’s house).

Today I’ll help you decide what type of backups work best for you and what hard drive and/or software you’ll need. Next week we’ll talk about how to actually put your backup plan into action!

Buying an external hard drive

The main way to backup your computer is to buy an external hard drive and plug it into your computer when you want to create a backup copy.[2] You have a copy of your files right there in your hands, but you have to remember to plug in the backup regularly and find an offsite location for it.

How much space do you need on your external hard drive? Short answer: at least as much space as your computer’s hard drive has, and preferably double it (more space never hurts).

hard drive capacity in Windows
Hard drive capacity in Windows (Photo courtesy of wikiHow)

For Windows: To find your hard drive capacity in Windows 8, open File Explorer[3], right-click on “This PC” on the left side, and click “Properties.” In Windows 7, click the Start button on your desktop and click “Computer.” Right-click on “Local Disk” near the top, and click “Properties.” The Properties window will show your total capacity in gigabytes (GB), as well as how much is used.


Hard drive capacity on a Mac

On a Mac: click the Apple logo in the top-left corner of your screen, and click “About This Mac” in the drop-down menu. In the little window that pops up, click “More Info,” then click the “Storage” tab along the top of the window.

Where to buy

You can find an external hard drive at a local place like Best Buy or at an online store like Amazon. It will connect to your computer with an included USB cable. Again, you’re looking for at least double the capacity of your computer’s drive. Here’s a conversion you will probably need: 1 terabyte (TB) equals about 1,000 GB. A 1TB external drive is around $70 right now. WD, Seagate, or Toshiba are popular and comparable brands.[4]

I hope you’ve realized the importance of backing up all the valuable information you have stored on your computer. Come back next week as I show you how to actually set up your backup software (which is included with your computer). You’ll see that the backups are very easy to do once you’ve initially set up the software.

In the meantime: homework! Go get a hard drive so we can set it up next week.

As always, send me any questions you have or topics you’d like me to talk about. And click the buttons at the very bottom to share this post with someone who might need it. Thanks for reading! See you next week.

1 – Full disclosure: Backblaze, the company that authored this study, offers cloud backup plans.
2 – Another option is “cloud” backups. Two of the more popular options in cloud backups are CrashPlan and Backblaze. This site has a more detailed explanation.
3 – Open File Explorer by swiping in from the right edge of the screen, tapping Search (or if you’re using a mouse, pointing to the upper-right corner of the screen, moving the mouse pointer down, and then clicking Search), entering File Explorer in the search box, and then tapping or clicking File Explorer.
4 – If you have a Mac, you don’t necessary need a drive labelled “For Mac.” They’re typically more expensive, but are ready for your computer out-of-the-box. A non-“For Mac” drive can be quickly formatted to work on a Mac, so decide whether you want pay a little more for a drive pre-formatted for your Mac.

%d bloggers like this: